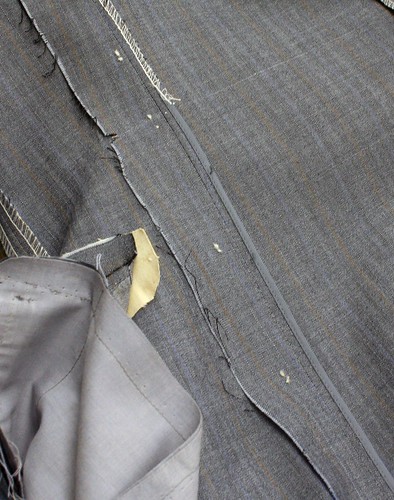
A friend donated what was sold on ebay as a vintage Savile Row suit to my dissection project. At first glance it had most of the hallmarks of a SR suit but a few details were bothering me. I'll get into those in due course. One of my first reactions was also that the finishing was quite a bit neater than I'm used to seeing from SR (except the buttonholes which were meh), but one of the houses could have discovered someone fantastic..... In the process of taking the thing apart there was a surprise and a possible clue. Again, all in due course.
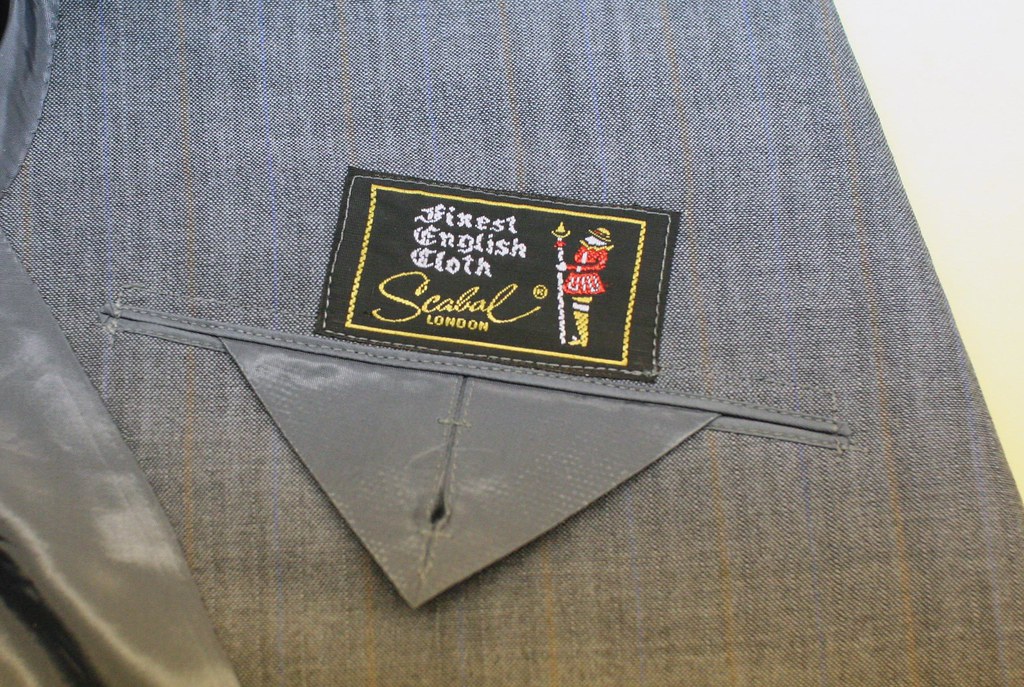
First off, there is no maker label, no customer label, only the cloth label- Scabal. There is also no indication of this garment ever having been worn; was this a RTW suit or a window sample? Was this made for Scabal to showcase their cloth? The interior was carefully engineered, suggesting a different approach to the lining than we usually use in bespoke (as in, a proper paper pattern appears to have been carefully made for the lining). I notice that the canvas used is quite stiff, which is not unusual for many SR houses. The pockets, both inside and out, have been very carefully made, and the inside pockets are particularly well done with tiny little jets. The envelope flap on the inside pocket, as well as several other key parts, have been stiffened with tailor's soap or starch, giving a very crisp, firm appearance. It is obvious that neatness and cleanliness area high priority for this maker.
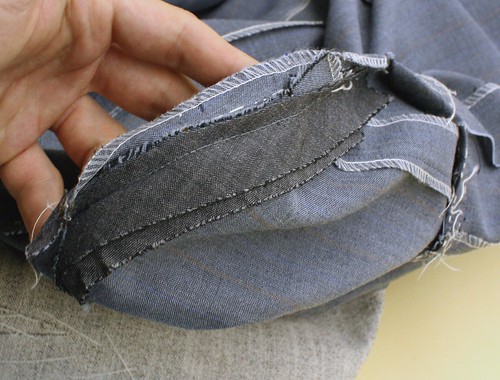
To appreciate the neatness it is perhaps useful to compare the pocket to another one made using the same basic technique by a Hong Kong tailor (thanks for photo sent by Schneidergott). Note also the hand finishing of the armholes.
NOTE- I have put large size photos so you can see up close. If you have trouble with your monitor, click on it and it will take you to the Flickr site where they are hosted. Click on All SIZES, then LARGE to see the full res photo.

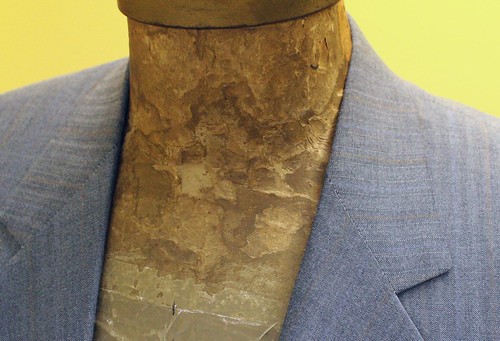
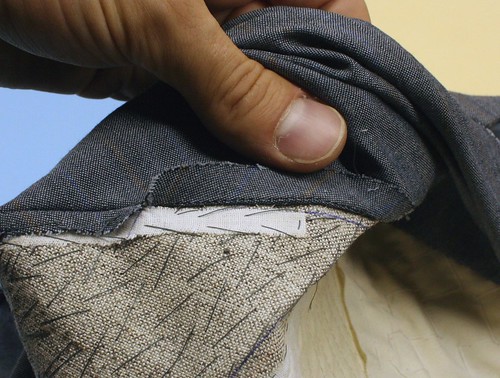
Placing the garment on an old tailor's dummy we see that the collar sits flush with the chest and tight to the neck. I put the garment on (it's rather tight fitting) and moved around a bunch and the collar stayed put. The collar, in my opinion, is rather binary- either it sits well or it doesn't- there is no middle ground, and in my opinion this collar sits well. All the more surprising to turn it up to find that the pad stitching has been done by machine. It is a self-cloth under collar which has the advantage of being finer and thus a bit flatter than felt or melton, but the linen canvas has not even been padded using the typical padding machine but with a plain machine. The rest of the collar construction has been done by hand so I don't think this was done to save time or money since the savings is really quite negligible- the line of stitching around the neck line is meant to hold the seam allowance in place, not to fell the collar to the coat- the felling has been done by hand. This speaks to the debate over hand padded versus machine padded collars; machine padded collars, done with the padding machine, are rolled to some degree but not as much as when done by hand and the proponents of hand padding insist that machine padding is inferior. Here we have a collar that has been padded by plain machine yet exhibits all the characteristics of a well-fitting collar. Hand padding would not make this fit any better- it can't get closer to the chest or neck, and there is absolutely no sign of it lifting away no matter how I move in it. Home sewers take note.

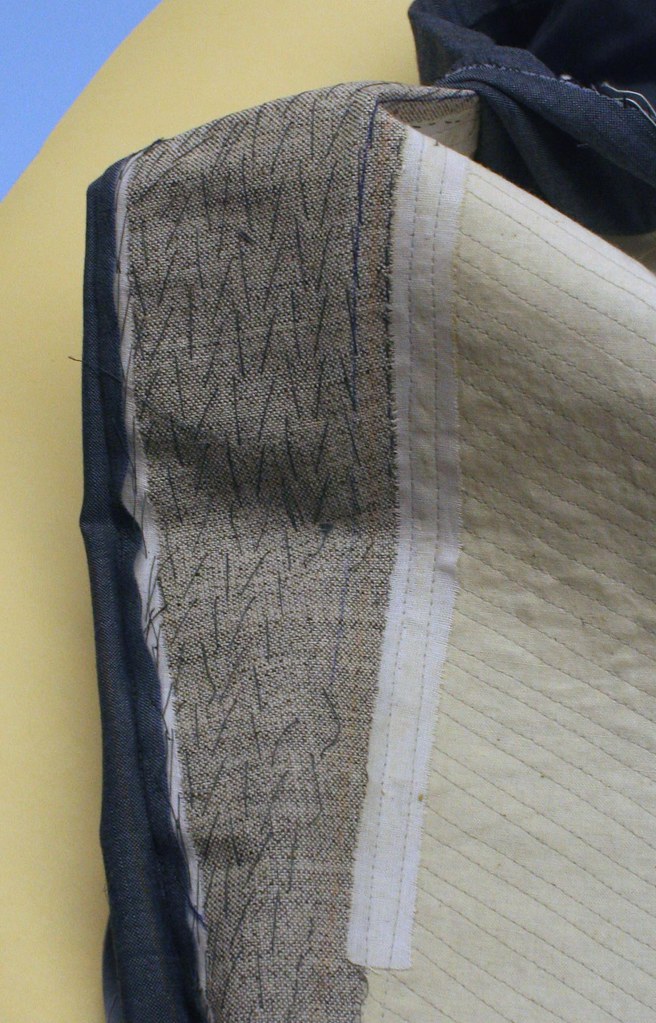
The interior is a typical buggy-lined finishing, done by hand, very neatly. The seam edges are piped with a tiny 2mm (less than 1/8") piping; the piping is sewn on right sides together at 2mm, then it is turned over the edge, pressed, stitched very precisely along the edge, then stitched again about 4mm away to fell the raw edge of the lining tape. Working in such small scale, the seaming has to be absolutely perfect for it not to look a mess, and they have done a very good job. Notice also, if you can, the hand finishing at the side seam, which we can compare to the finishing of SG's HK coat.
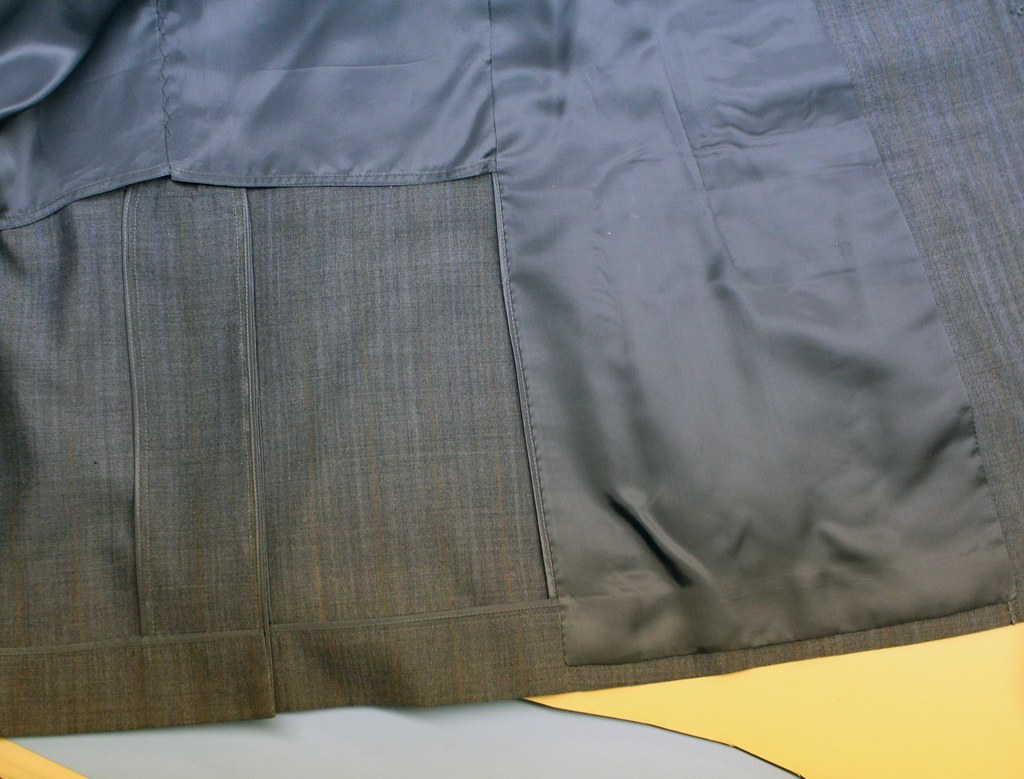
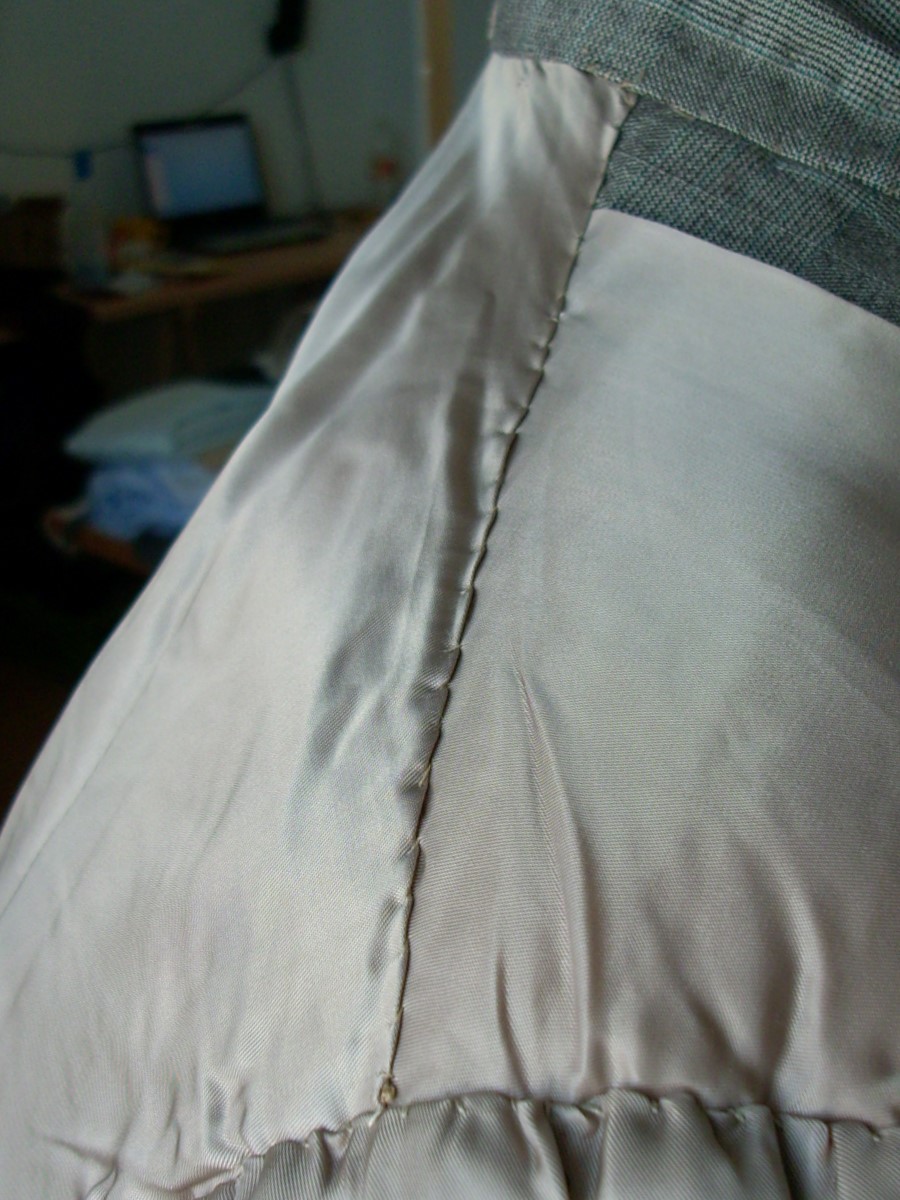
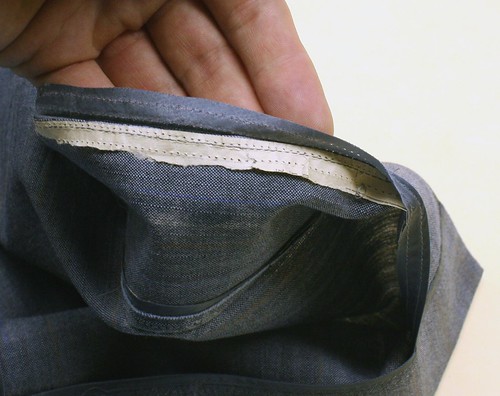
The vent underlay is round, and the piping around this edge is done just as perfectly as the straight edges; anyone who has gone around corners like this knows how difficult it can be to control, especially where bias areas tend to stretch and move. The work on this is impeccable.
Compare the seam finishing to another example posted on the web by a SR house
Contrasting piping is very decorative but I think it needs to absolutely perfect to not look sloppy. My personal preference would be the way this mystery suit was done (in terms of piping width and precision).
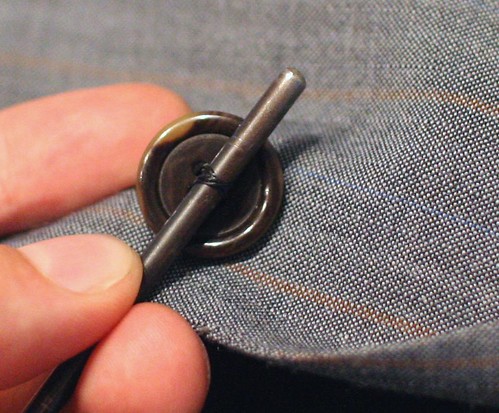
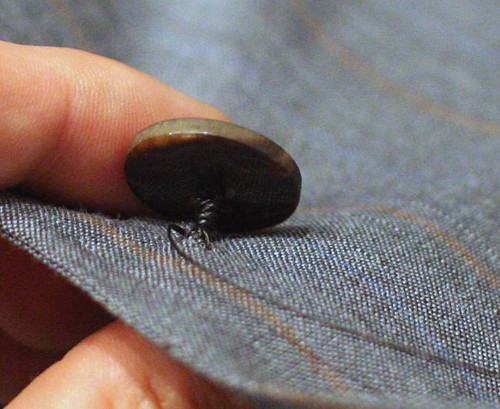
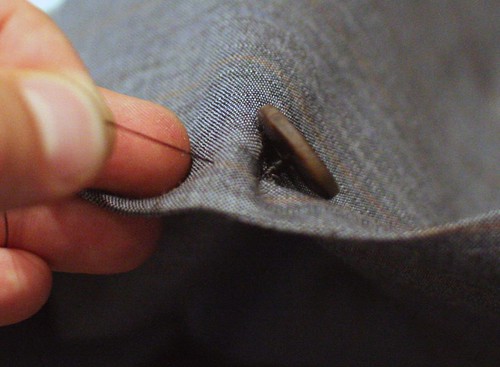
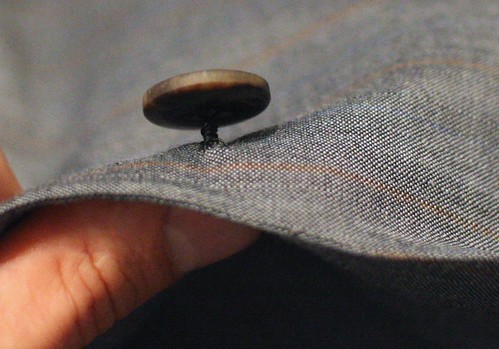
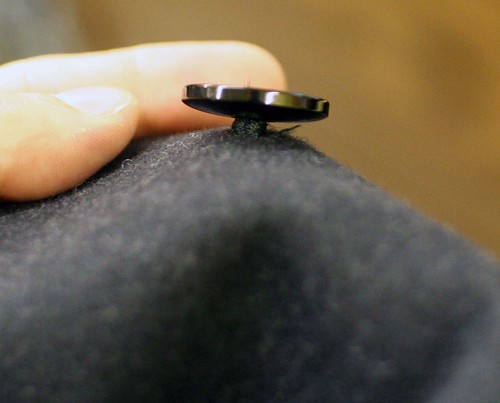
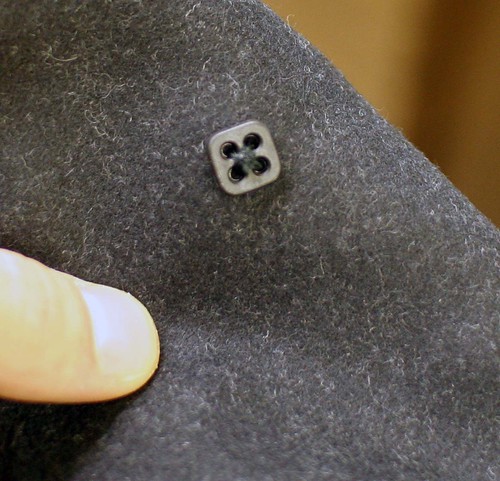
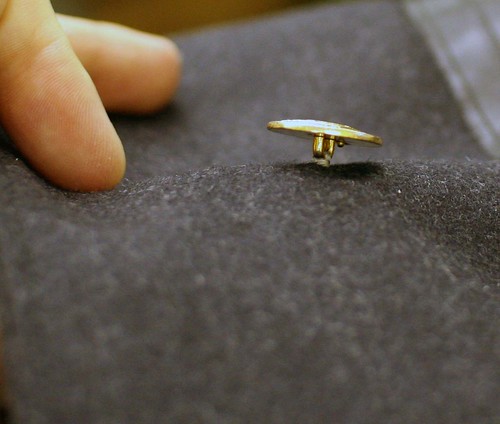
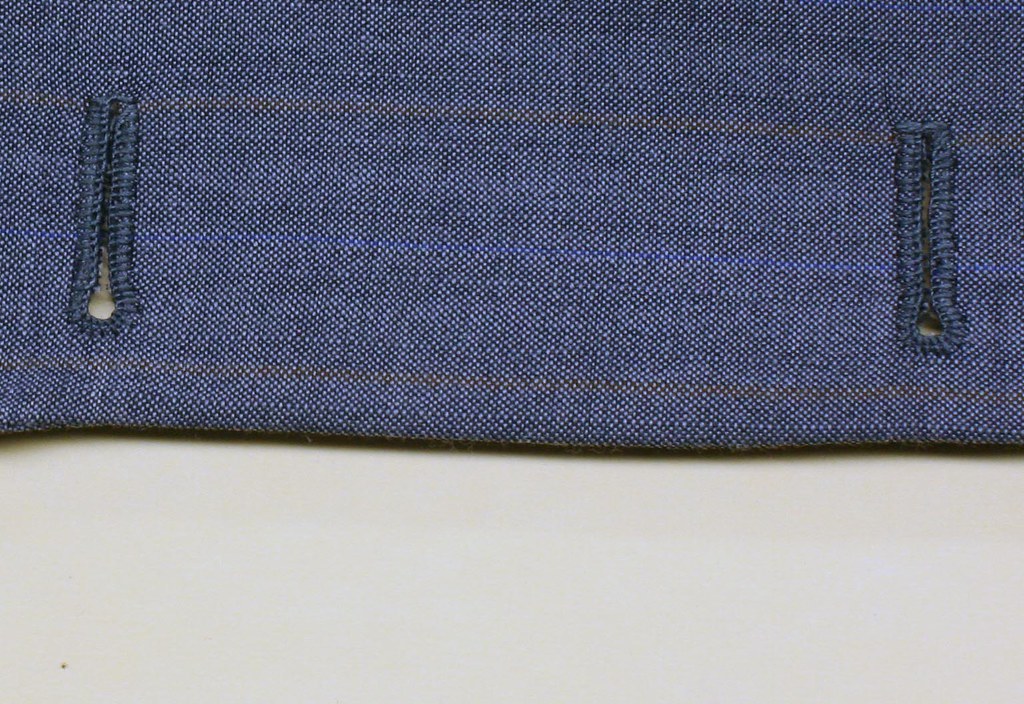
The buttonholes, as I mentioned, are disappointing considering the high level of finishing, but I have seen much worse.
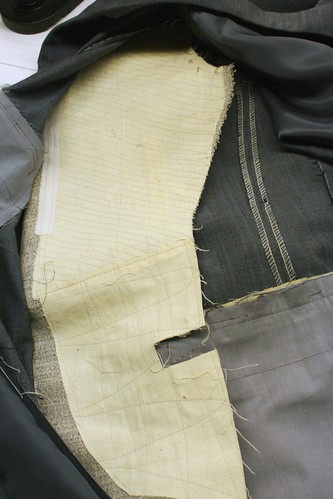
The lapel has been padded by hand, with a layer of lining between the canvas and the cloth. Multiple layers padded together give added shape so not a terrible idea. The edge tape is applied by hand, and while there is no pick stitching in the traditional sense that it goes through all layers, the seam has been understitched by hand to prevent it rolling out to the wrong side. The facing is understitched by hand a second time, 1/4" away, below the breakpoint for extra reinforcement.
Like the collar, the canvas has been padded by machine. There are certain SR houses that do this so it is not necessarily an indicator of inferior workmanship. The machining is done in neat, precise rows which might have actually taken more time to do than it would have taken to do by hand; machining, though, gives a certain stiffness to the already firm canvas. Some prefer structure and cleanliness over softness
Curiously, the gorge has been sewn by machine and tacked on the upper side of the collar. This means that the top collar was not just stretched and worked over the undercollar, trimming away excess and then felled by hand in the usual manner by the tailor; a paper pattern had to be pre-engineered to fit over the undercollar. This tells me that the cutter had some pretty advanced skills, and on certain cloths it is much cleaner to sew the gorge by machine than by hand, so this is not surprising given the attention to cleanliness in the rest of the garment.
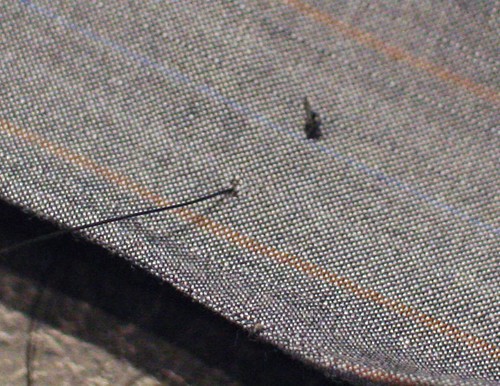
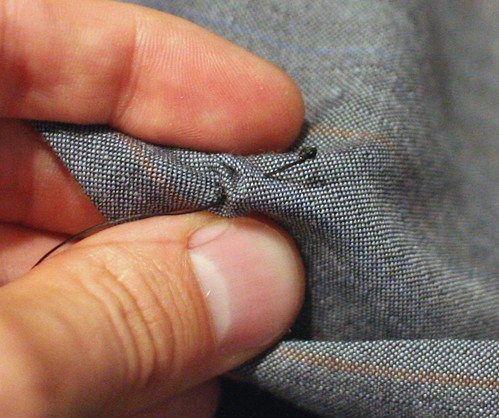
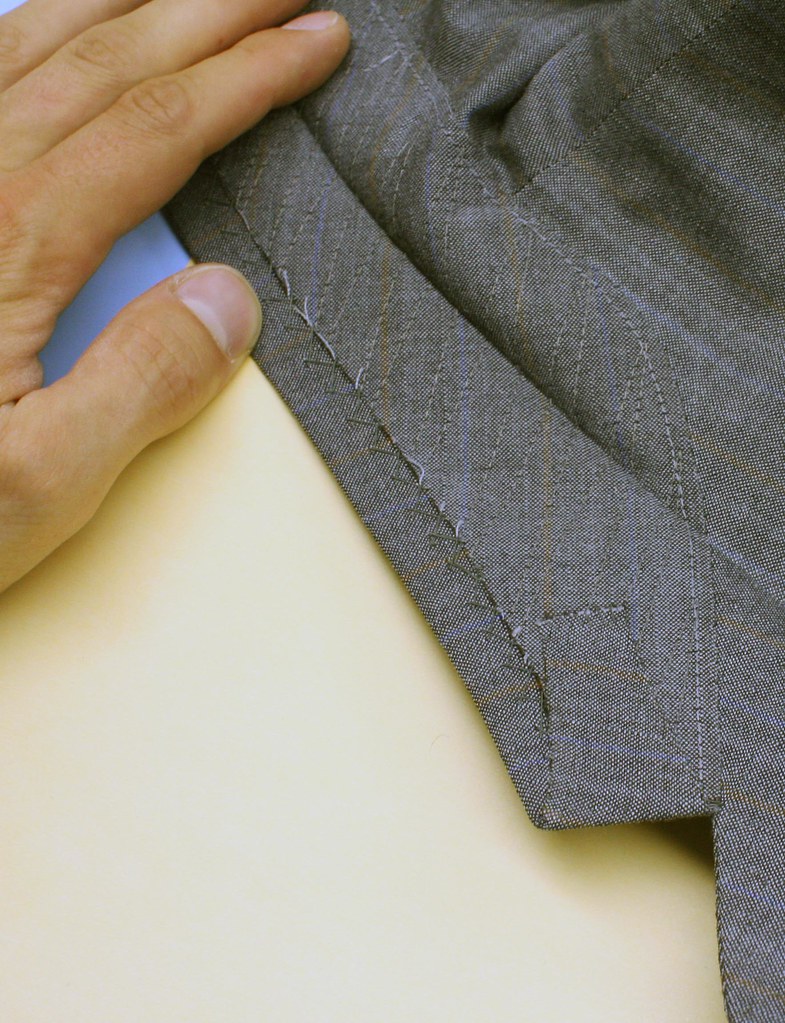
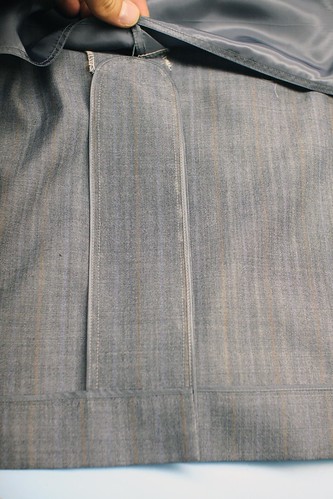
So far I am thinking that this is a very well-made RTW garment because of the level of engineering in the lining and collar- this shows some extra work on the cutter's part which is often reserved for when several garments will be made off the same pattern. Otherwise a lot of this work is left up to the tailor, which is clearly not the case. What tells me for sure that this is NOT a RTW garment is the fact that the inlays, thread tacking, and chalk marking which we see only on bespoke garments are still intact, like here at the shoulder and sleeve seams.
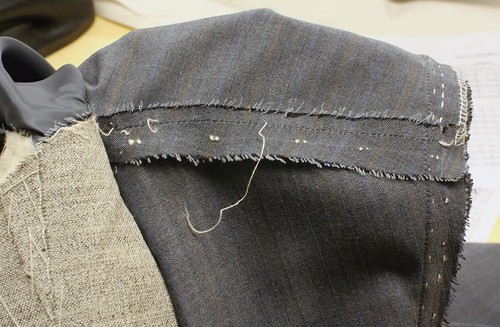
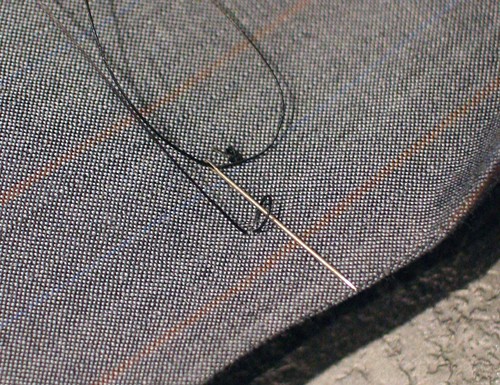
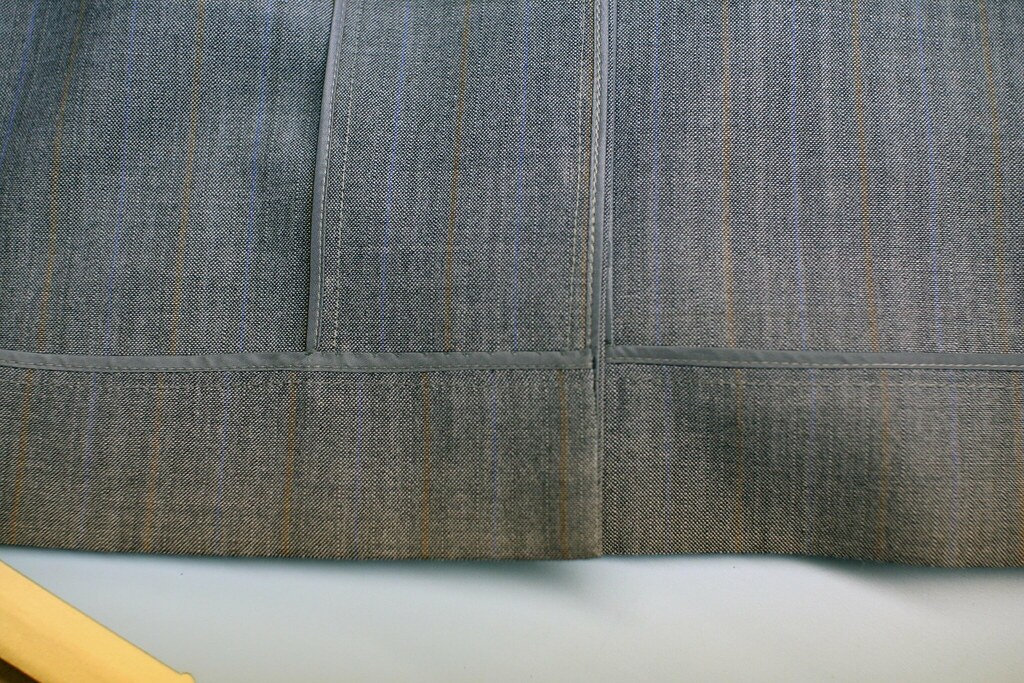
There is evidence of alterations to the side seams which would have been done during a baste fitting so there is no longer much doubt in my mind that this was a bespoke garment fitted to somebody. Then I notice the absolute giveaway, which don't really show up in photos; balance construction lines are still faintly visible in chalk. Not only was this garment bespoke, but there was no paper pattern- it was drafted directly onto the cloth. The horizontal lines at the breast, the shoulder blade, the side seam level and waist line are still visible, as well as lines used to calculate shoulder slope, neck width and front scye position.
Ordinarily I draft onto paper, cut from that, then transfer any adjustments during fittings back onto the paper. Some dispense with the paper altogether but then there is no record for the next time we cut for the same client (we do hope to have repeats after all). This cutter must have drafted onto the cloth, fitted, then ripped down to make a paper pattern from the ripped pieces. Regardless, not only the finishing is good but the drafting is good too.
Curious, I studied the construction lines and some of the measurements and it would correspond quite closely to something drafted for a 36" chest from a Modern Tailor, Outfitter and Clothier draft by Whife. Worth noting is that the coat and sleeve length are definitely for a short person (I'm guessing around 5' 6").
There is no wadding in the sleeve head to break down over time, instead a bias cut strip of cloth similar in weight and construction was sewn in as a sleeve head. This idea of sleeve heads and shoulder pads "breaking down over time" drives me a little nuts. I think a garment should hold up over time and look the same ten years from when it was delivered. Hearing tailors tell their clients "oh it will break down over time" sounds like a way of getting customers out of the shop to me. Or shoddy practices which don't hold up.
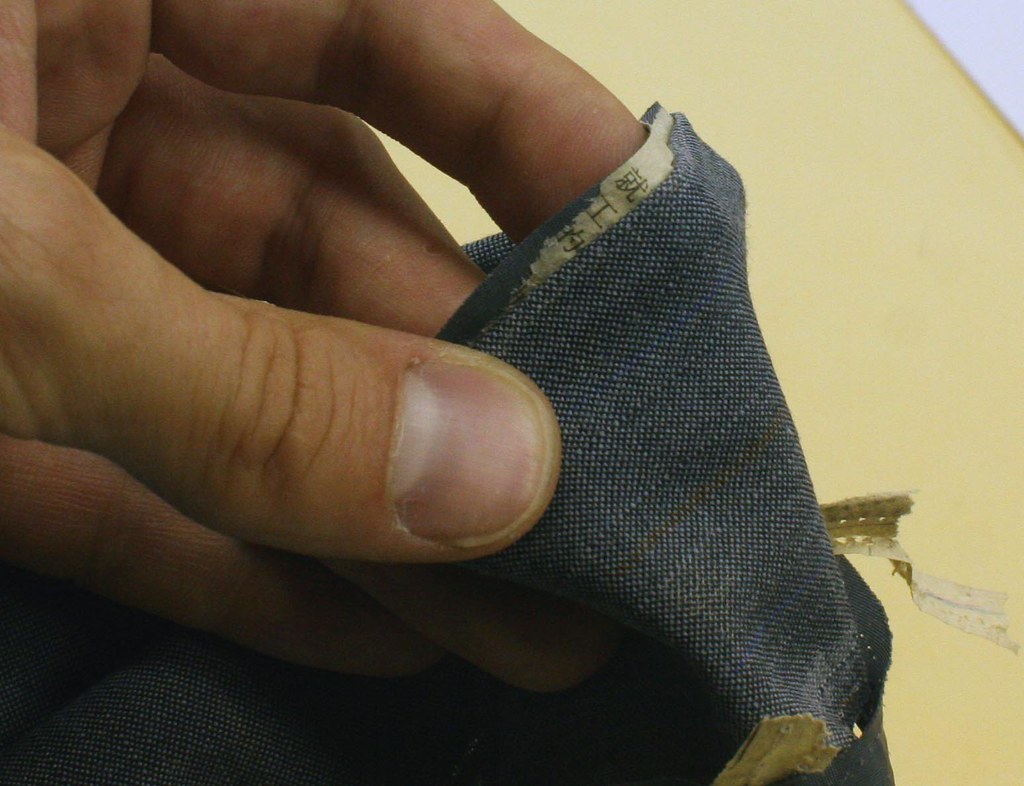
Gong back to the hem underlay, I noticed it was crisper than the seams, but since a good deal of starch had been used in other parts I was not surprised. I decided, however, to unpick the piping and found paper in the seam. I am reminded of the technique of using tissue paper to cut and sew difficult cloth like chiffon. You would lay the underlay piece on a piece of paper which would prevent it shifting as you go around the corners, place the lining tape and sew around the edges through all layers. The paper will help reinforce the edges when turning the piping and make the job that much cleaner. Then the excess is torn away, leaving only a small amount hidden under the piping.
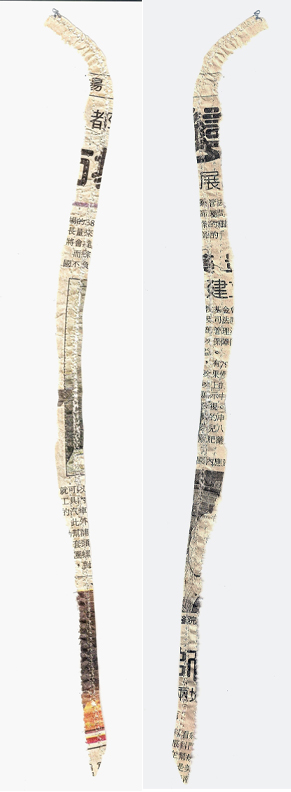
The final little bit of curiousness is this- the newsprint used was from a Chinese newspaper. So either this suit was made in China or Hong Kong (this would have been made before the reunification) by a foreign-trained cutter and tailor, or some tailor shop was using immigrant labor (very possible as well).
Interesting......
In response to a question, I really don't know if it was common to use mainland workshops during the British period, but I will ask the question at WW Chan, who say that the work is "OK" and pretty typical of HK during the 80s. And here is the rest of the paper that I managed to get- it's not terribly clear but maybe you can see something?